First Aid Explained
Disclaimer:
This website is intended to assist with patient education and should not be used as a diagnostic, treatment or prescription service, forum or platform. Always consult your own healthcare practitioner for a more personalised and detailed opinion
How to Carry an Injured Person Using Two People
We have selected the following expert medical opinion based on its clarity, reliability and accuracy. Credits: Sourced from the website wikiHow. Please refer to your own medical practitioner for a final perspective, assessment or evaluation.
Overview
If you are in a remote location or another situation in which someone is injured and there are little or no emergency services or first aid kits available, you may need to carry the person to safety or treatment. While this may seem daunting, if you have a second person with you, there are a variety of ways in which to carry the injured party if they are conscious or unconscious. By employing any of these different carries, you may help or even rescue someone with an injury. And remember to use proper lifting technique when picking up a wounded person — always lift with your legs, not your back.
1: Using the Human Crutch
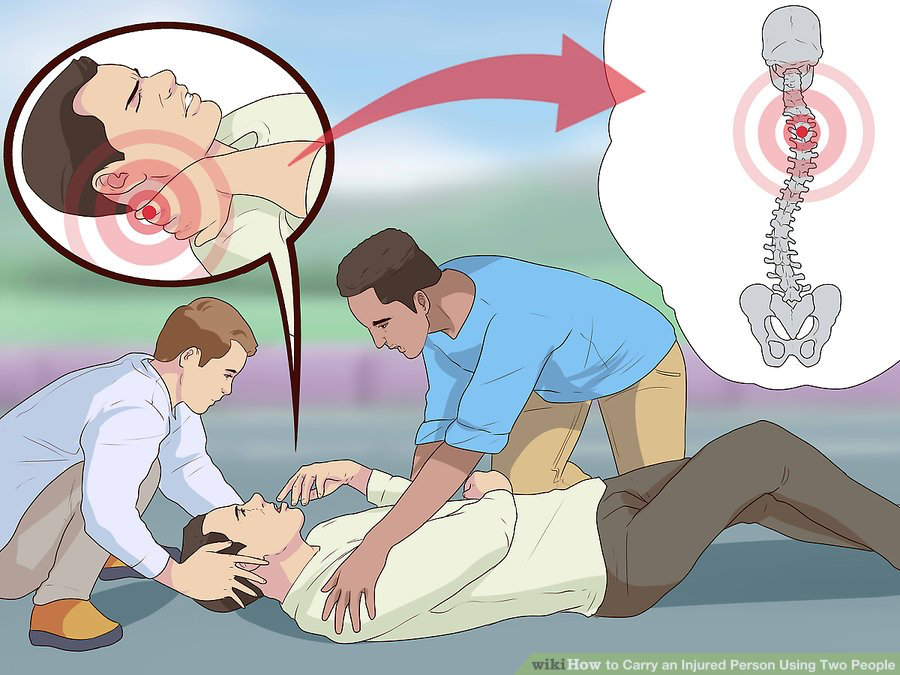
1. Check the person for neck and back injuries
Do not attempt to move anyone who may have a neck or spinal injury.
Assume a head or neck injury if:
- The person complains of severe neck or back pain
- The injury has exerted substantial force on the back or head
- The person complains of weakness, numbness or paralysis or lacks control of his limbs, bladder or bowels
- The person's neck or back is twisted or positioned oddly
2. Leave person on the ground to start
While you put yourself and the other person in the proper positions to utilize the human crutch, leave the injured party on the ground. This can help ensure that you don’t drop or further injure the person while you shift yourselves into the proper technique.
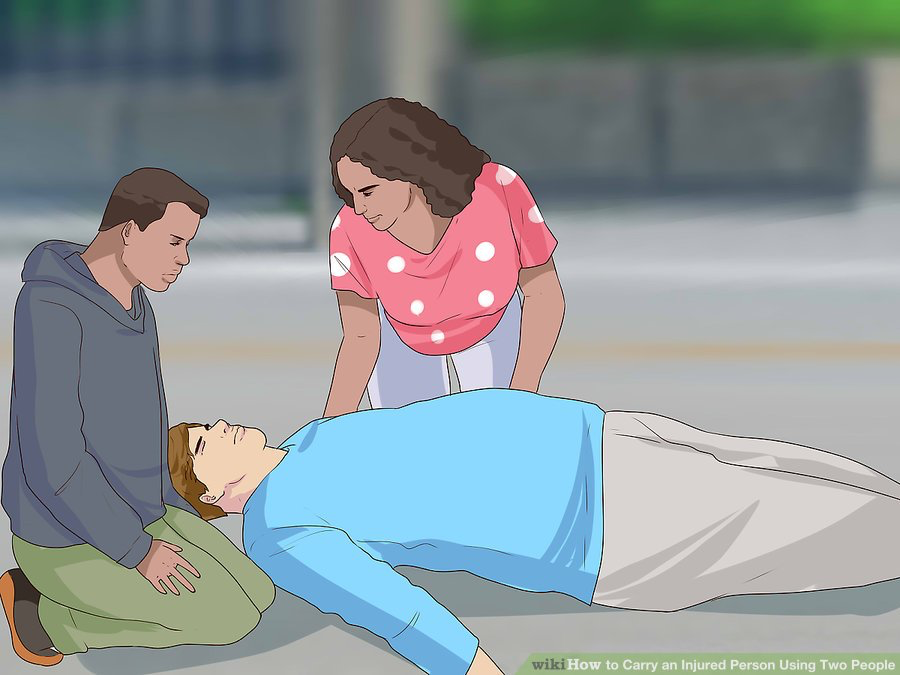
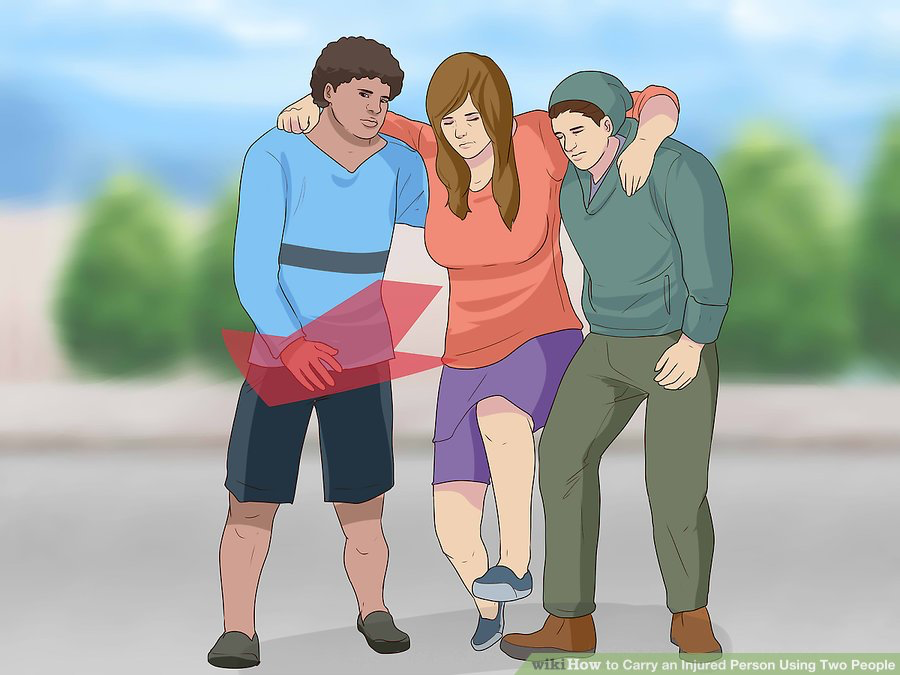
3. Put your bodies in the proper position
You and the other rescuer should stand on either side of the injured person's chest, facing each other. Making sure you are in the proper position can help minimize the risk of dropping the person or injuring him further.
- Each rescuer should grab the wrist of the injured person with whichever hand is closest to the feet. Make sure to only do this on your side of the person.
- You and your partner’s remaining free hand should grab the person's clothing or nearest shoulder.
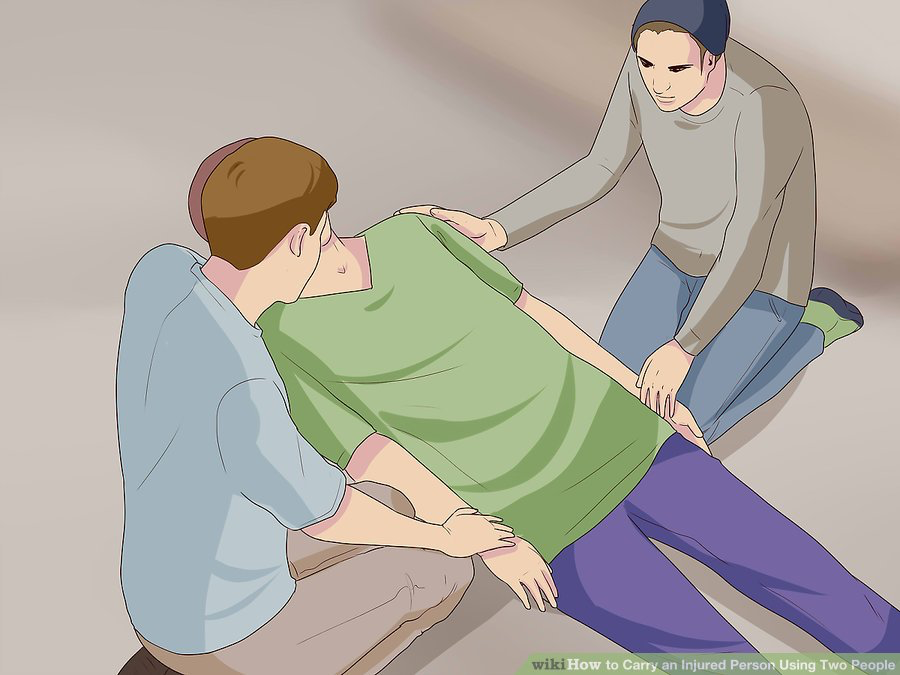
4. Pull the person to a sitting position
Once you and your partner have a firm grasp of the injured person, pull her up into a sitting position. Make sure to do this slowly so that you don’t accidentally jostle or lose grasp of the person.
- Slowly lifting the person to a seated position can also give her circulatory system a chance to stabilize, especially if she’s been lying on the ground. This can help prevent dizziness that may cause the person to fall.
- If she is conscious, you may want to verbally check in with the injured person to make sure that this doesn’t cause her any pain or confirm that she is feeling stable.
- Allow the person to sit at least for a couple of minutes before moving her to a standing position. At this point, instruct person you are going to move her to safety.
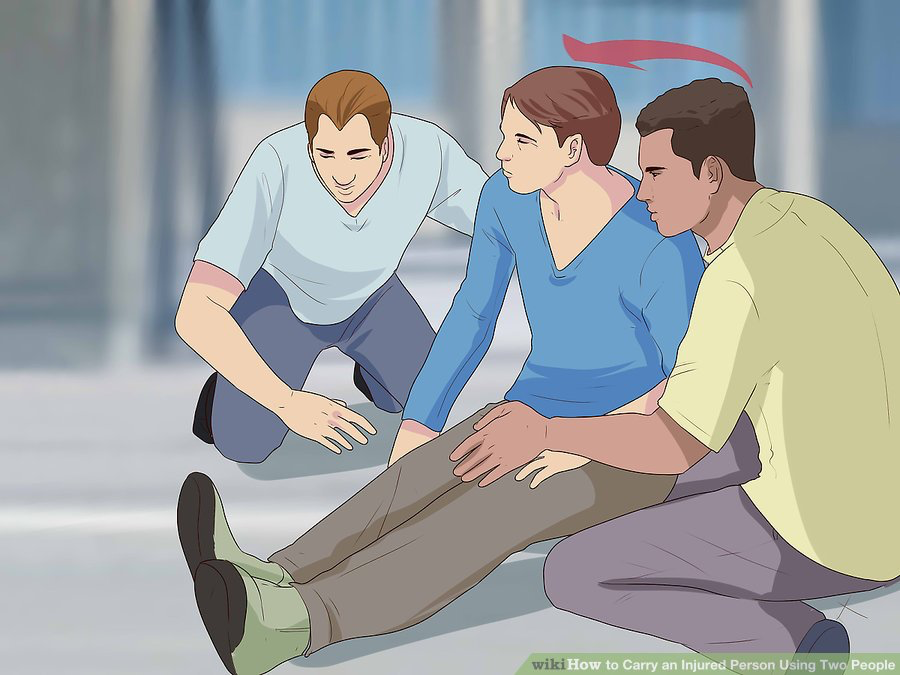
5. Assist the injured person to his feet
Once the injured person is ready and able, help the person to stand up. If not, lift the person to his feet by grasping clothing items.
- Give the person as much time as he needs to stand up, as long as there isn’t any other immediate danger. As with sitting, this can help stabilize his blood pressure and help prevent unnecessary falls.
- If the person is not able to place either a foot or both his feet on the ground, you may need to offer a little bit more support. Remove as much of the weight from his leg or legs as possible in this case.
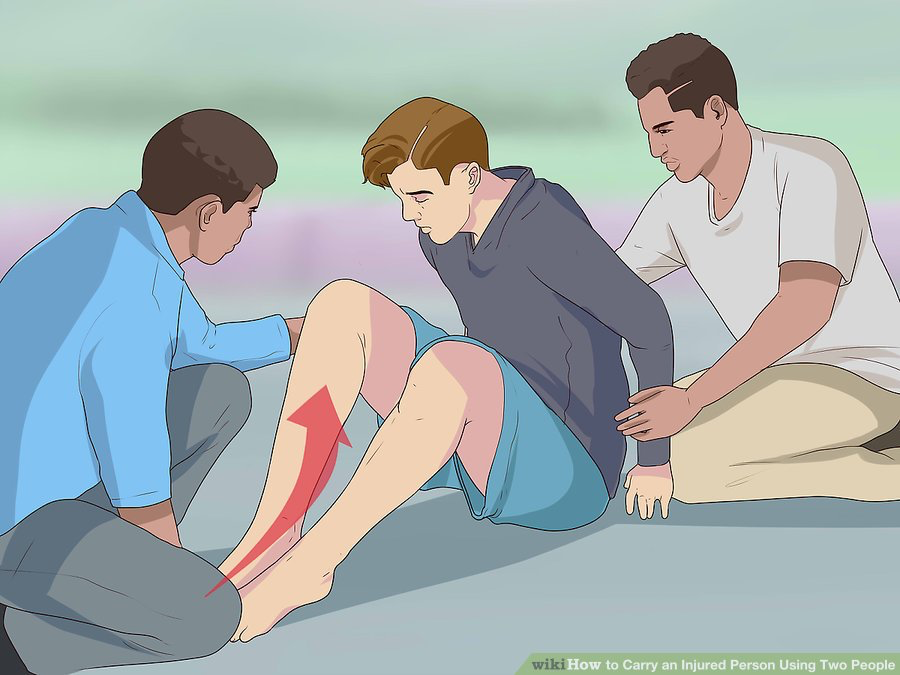
6. Wrap your hands around the injured person's waist
Once the person is standing, place your hands around the waist of the injured person. As you begin to move out the person, this can add an extra measure of security while assisting the person.
- If the person is unconscious, grasp her belt or waistband. Pull on it slightly to lift the person's upper body.
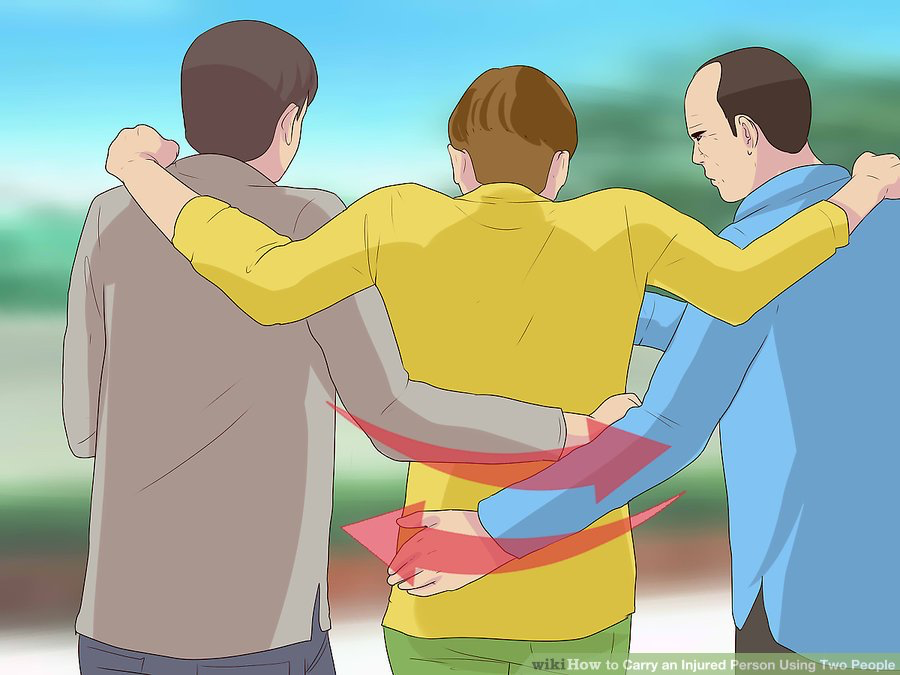
7. Place the injured person's arms over your shoulder
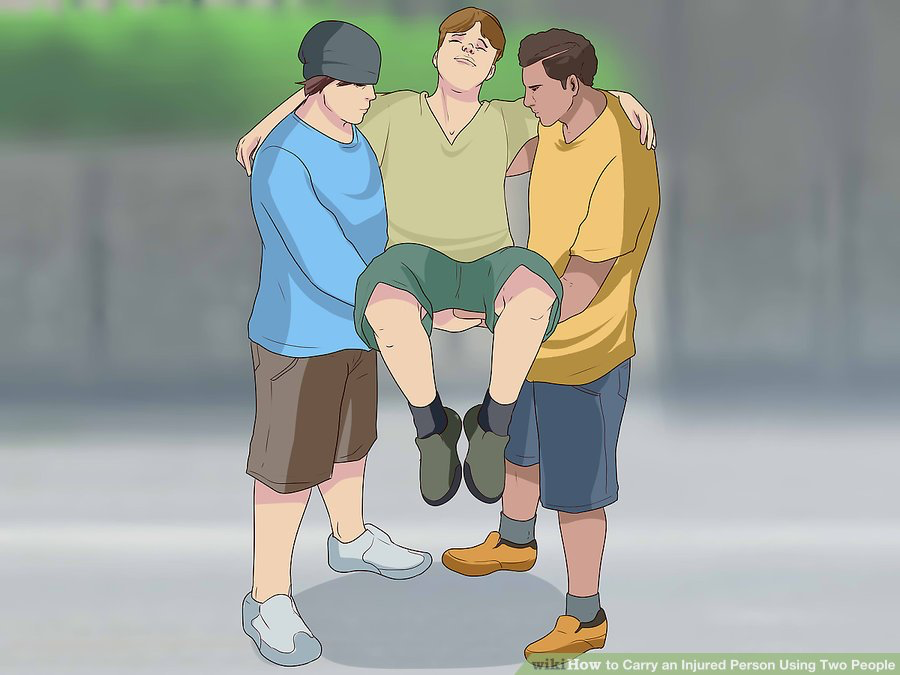
Squat down slightly and put the person's arms over your shoulder and that of your fellow rescuer. This should place you in the same direction as the injured person.
- The rescuers should use their legs to stand up with the injured person. Make sure to do this slowly to maintain stability of the grasp.
- Considering asking the person if he is still ok and ready to move out.
- Don't rush the person — give him plenty of time to stand up.
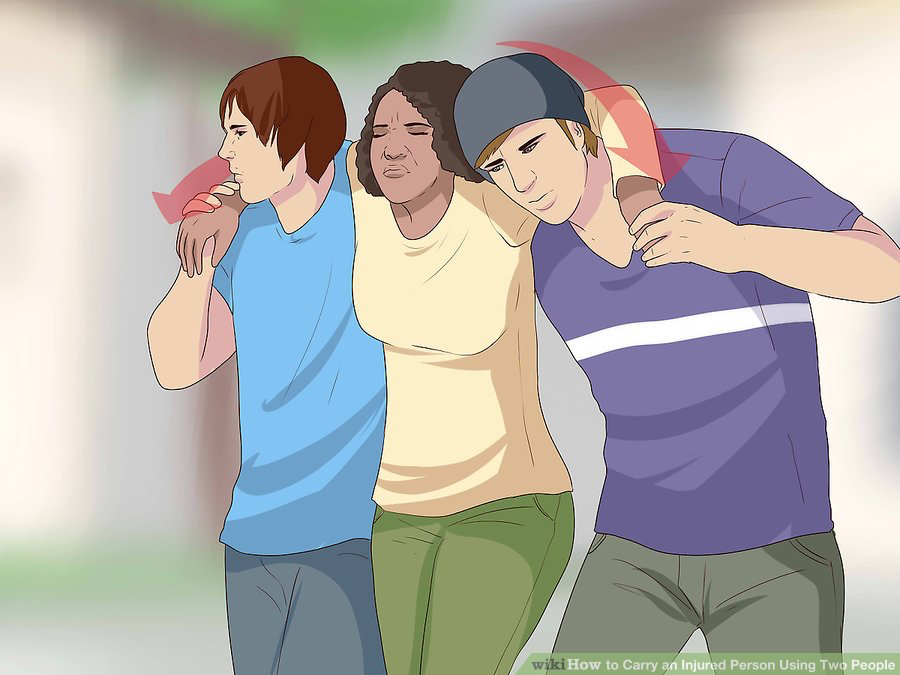
8. Move out with the injured person
Once everyone is standing and facing the same direction, you are ready to move out with the injured person. Make sure to check that the person is secure either by asking her or checking with your fellow rescuer if the person is unconscious. This can not only help ensure that you don’t drop or jostle the person, but also help you more effectively remove the injured party from the situation.
- The person's legs should be dragging behind you and your fellow rescuer.
- Make sure to make slow and deliberate movements when dragging out the person to help ensure safety.
2: Employing Alternative Carries
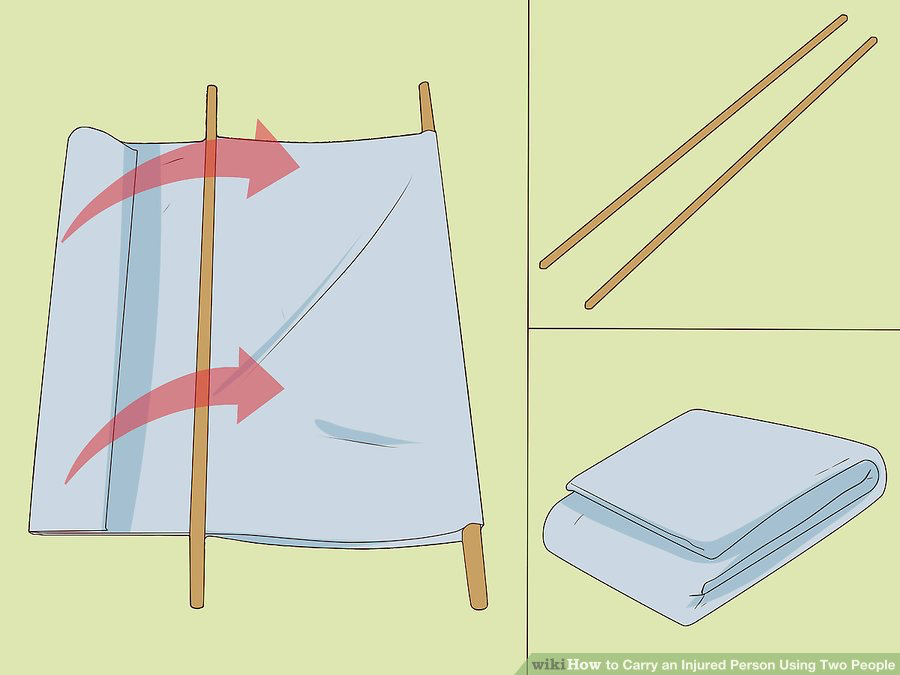
1. Improvise a stretcher to carry the injured person
If person is unconscious or unstable, make a stretcher to carry the person. You can use two poles or some blankets or improvise a stretcher out of whichever materials you have available.
- Find two sturdy poles, tree branches or other straight pole-like objects and place them parallel on the ground.
- Take a cloth roughly three times as big as the stretcher should be and lie it on the ground. Put a sturdy pole a third to half of the way along the cloth; fold the section over the pole.
- Set the other pole on the two pieces of cloth, leaving enough room for the injured person and enough cloth to fold over this second pole.
- Fold the cloth over the pole so that at least one foot of cloth encases the second pole. Take the rest of the cloth and fold it over your poles again.
- If you don't have a large cloth or blanket, use blankets, shirts, sweatshirts, or any other cloth you may have available. Do not give up your clothing if this will in any way hamper your ability to assist the person.
- Check to make sure that the stretcher you’ve fashioned is as secure as possible so that you don’t drop the person.
2. Fashion a stretcher using four hands
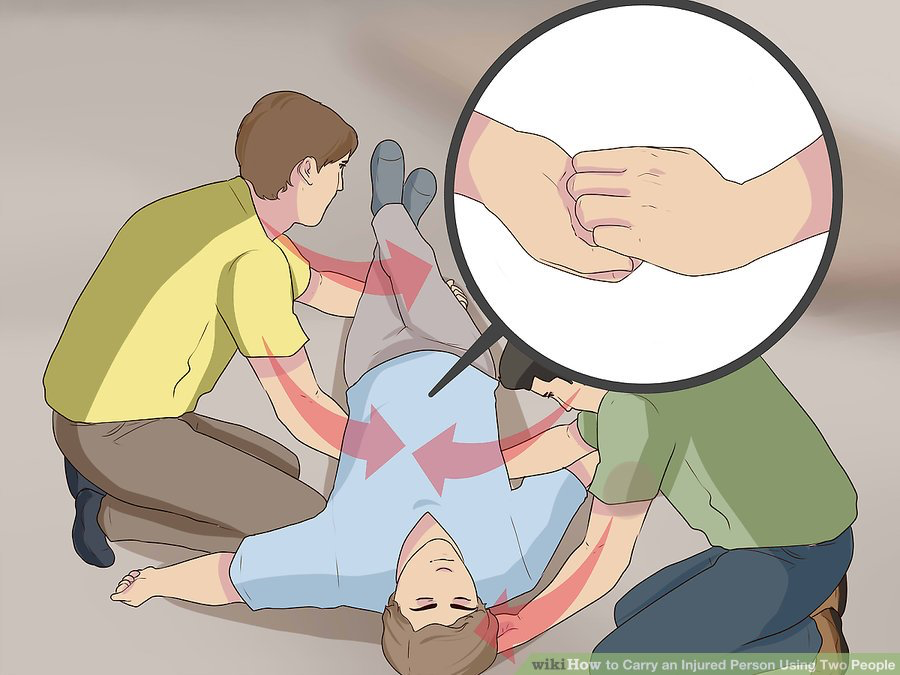
If you don’t have the materials to create a stretcher, you can also fashion one using the hands of yourself and your fellow rescuer. This can provide a more stable position to the person, especially if she is unconscious.
- The person should be on the ground and the rescuer with his hand closest to the the injured person's head should place his hand under her head for support.
- Under the the injured person's chest, at about the level of the lower sternum, each rescuer should grasp for the hand of his fellow rescuer. The rescuers should then interlock their hands for a stable surface.
- The rescuer with a hand closest to the injured person's feet should place his hand under her legs.
- Squat down and gently lift the person and move her out.
3. Carry the person with a chair
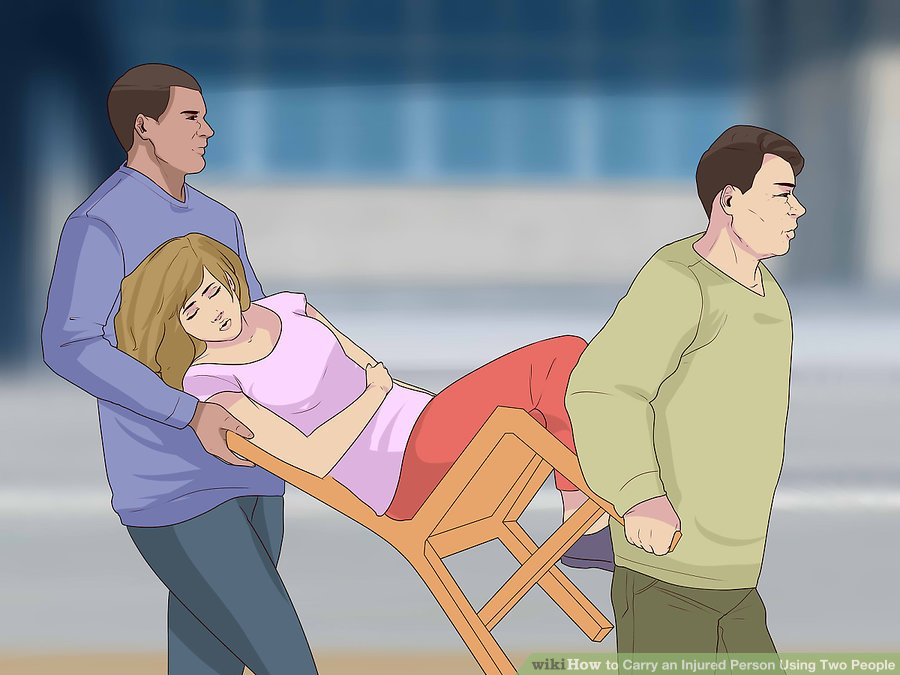
If it is available, use a chair to carry the injured person. This is an especially effective method if you and the other rescuer have to climb stairs or navigate narrow or uneven territory.
- Either pick up the person and place him in the chair or have him sit in the chair if he is able.
- The rescuer standing at the head of the chair should grasp the chair by the sides of the back with her palms facing in.
- From here, the rescuer at the head can tilt the chair on to its rear legs.
- The second rescuer should face the person and grasp the legs of the chair.
- If you have a longer distance to cover, you and your rescuer should separate the person's legs and pick up the chair by squatting down and lifting.
4. Construct a chair with your hands
If a chair is not readily available to help your carrying efforts, you and your fellow rescuer can make a chair using your hands. Whether a two- or four-handed seat, you can effectively move the injured person with these seats.
- A two-handed seat is most useful for carrying people longer distances or for supporting an unconscious person.
- Squat down on either side of the person. Slide one arm under her shoulders, resting your hand on the shoulder of your partner. Slide your other arm under the knees of the person and grasp the other rescuer’s wrists. Alternatively, you can both make a "hook" with your hands by curling your fingers in toward your palm, then hook your hands together.
- Lift up from squatting, lifting from your legs and keeping your back straight, and begin moving forward.
- A four-handed seat is most useful for carrying those who are still conscious.
- You and your fellow rescuer should grasp each other's wrists — he should grasp your left wrist with his right hand, and you should grasp your right wrist with your left hand. Your right hand should grasp his left wrist, and his left hand should grasp his right wrist.Your hands should form a square shape when locked together in this configuration.
- Lower this seat to a height that allows the injured person to sit. Make sure to lower the seat using your legs and not your back to minimize your risk of injury and ensure stability. Have the person drape her arms over your shoulders.
- Stand using your legs, keeping your back straight.
_______________________________________________________________________________________________________________________
Are you a healthcare practitioner who enjoys patient education, interaction and communication?
If so, we invite you to criticise, contribute to or help improve our content. We find that many practicing doctors who regularly communicate with patients develop novel and often highly effective ways to convey complex medical information in a simplified, accurate and compassionate manner.
MedSquirrel is a shared knowledge, collective intelligence digital platform developed to share medical expertise between doctors and patients. We support collaboration, as opposed to competition, between all members of the healthcare profession and are striving towards the provision of peer reviewed, accurate and simplified medical information to patients. Please share your unique communication style, experience and insights with a wider audience of patients, as well as your colleagues, by contributing to our digital platform.
Your contribution will be credited to you and your name, practice and field of interest will be made visible to the world. (Contact us via the orange feed-back button on the right).