First Aid Explained
Disclaimer:
This website is intended to assist with patient education and should not be used as a diagnostic, treatment or prescription service, forum or platform. Always consult your own healthcare practitioner for a more personalised and detailed opinion
How to Backboard a Spinal Injury Victim in the Water

We have selected the following expert medical opinion based on its clarity, reliability and accuracy. Credits: Sourced from the website wikiHow. Please refer to your own medical practitioner for a final perspective, assessment or evaluation.
Overview
Every lifeguard's worst nightmare is having to perform a real in water spinal rescue. This is because the delicate and difficult procedure must be executed perfectly to ensure that the victim has the greatest chance of walking away from whatever accident occurred. Whether you are a lifeguard or not, having a set of instructions to review can increase your confidence in preforming this rescue and allow for the best possible outcome for the victim.
Part 1: Rescuing the Victim
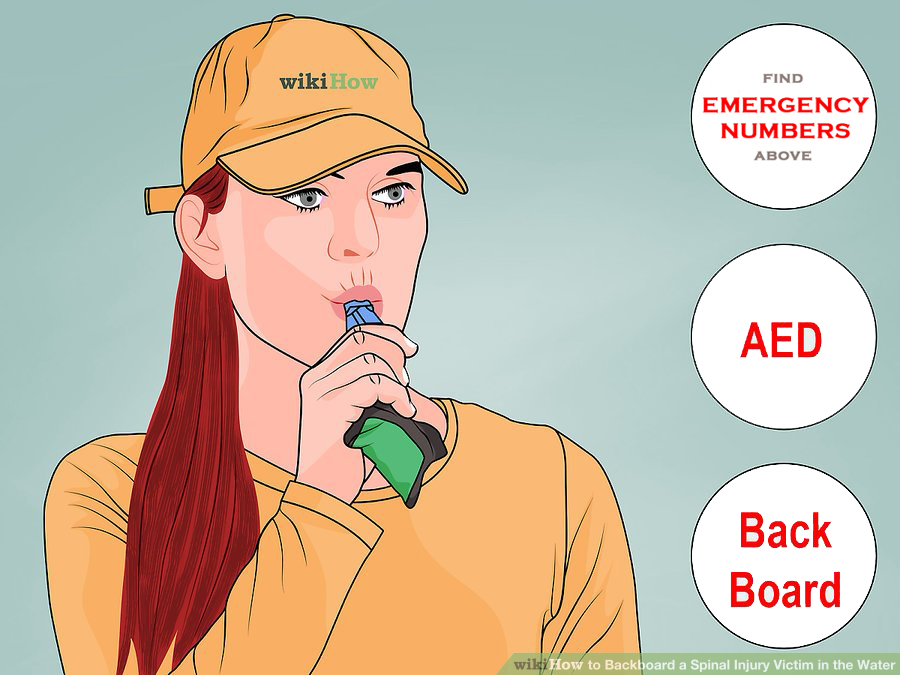
1. Activate the Emergency Action Plan (EAP)
Let others know about the situation so they can assist in the rescue.
- Blow your whistle and clear the pool.
- Have another lifeguard or a person nearby call emergency services (see "EMERGENCY NUMBERS" above).
- Have another lifeguard or person grab the Automatic External Defibrillator (AED) and bring it to you.
- Have a secondary lifeguard bring you a backboard.

2. Approach the victim
After activating the EAP, carefully slide into the water and walk towards the victim. Avoid making a large splash and making waves in the water. They could jostle the victim and hurt them more.

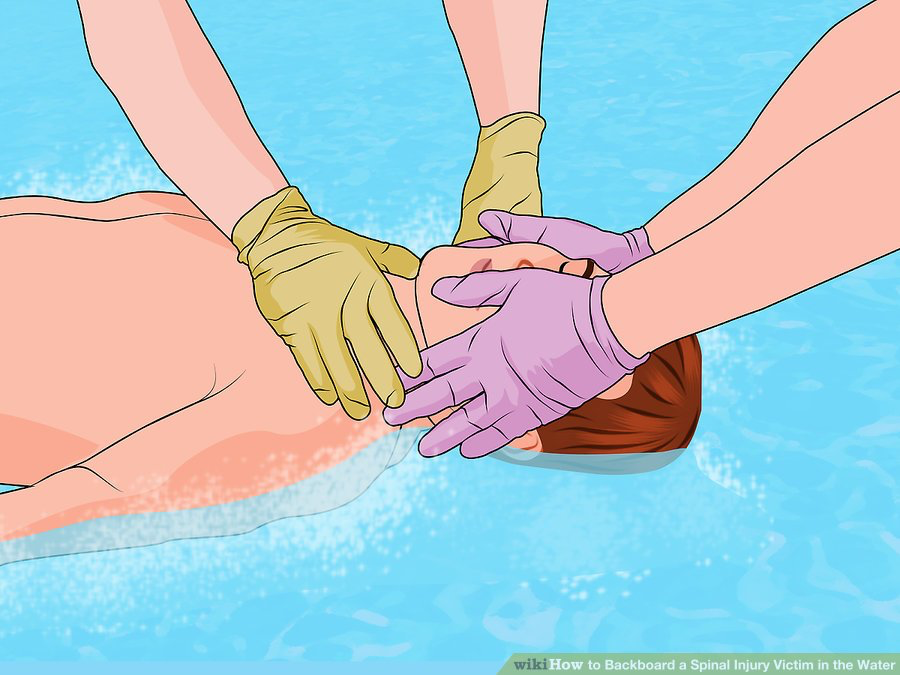
3. Splint the victim's head and neck
Carefully raise the victim's arms above his/her head, bringing them to a point. Firmly hold the victim's arms in that position, bracing them against his/her head in order to immobilize the head and neck. Be sure to keep their body in a straight line parallel to the surface of the water so to not bed their spine.
- Once you establish stabilization of the head and neck, do not break that stabilization. It could cause paralysis of the victim. You can change the method of stabilization, but do not break it.

Part 2: Placing The Backboard
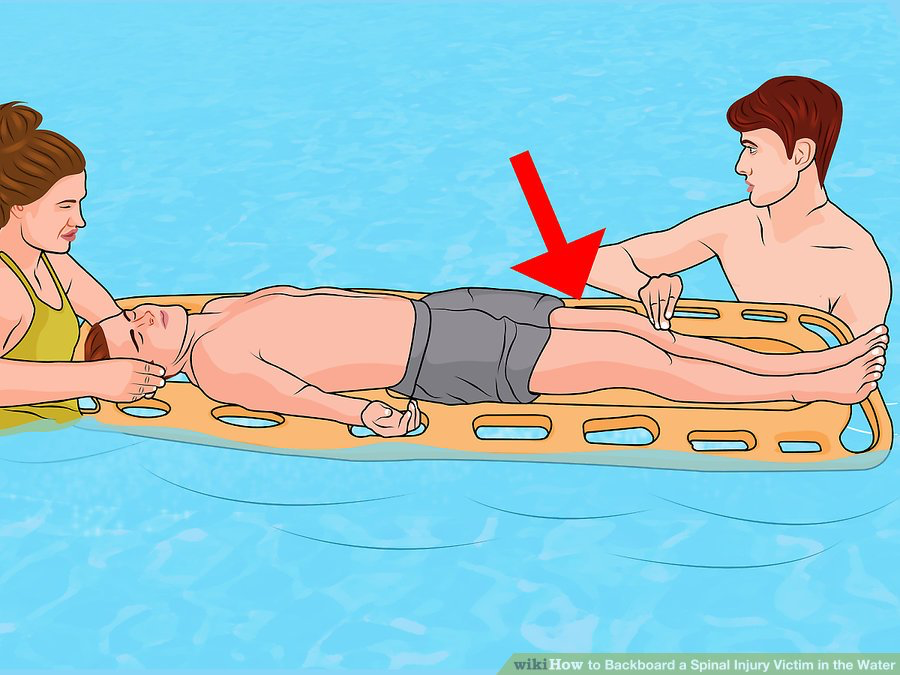
1. Place victim onto the backboard
While you are holding the victims arms against his/her head, have your secondary lifeguard approach you with the backboard.
- Instruct them to come up to the side of your body in which you are holding the victim.
- Have them tilt the backboard all the way on its side and swiftly dunk it straight down into the water.
- As the board begins to rise back to the surface and lay flat again, instruct your secondary guard to position it beneath the victim so that his/her head will be within the head restraint box.

2. Change the head-splint hold
Once the backboard is placed, you must begin preparation to secure the victim to the board by first changing the head-splint technique being used and then the position of the backboard in the water.
- Have your secondary guard firmly grasp the victims chin with one hand while resting their forearm down the middle of the victim's chest. Have them place their other hand on the bottom of the board to stabilize it.
- After your secondary guard has taken control of immobilizing your victim's head and neck, gently walk the backboard over to a pool wall. Stand behind the board with your back against the wall. Lower the victim's arms down to his/her sides and regain control of the immobilization of the head and neck by placing one hand on either side of the victim's head over each of his/her ears.

3. Stabilize the backboard
When you position yourself at the wall, you will need additional support for the backboard. Your secondary lifeguard can do this by placing rescue tubes beneath the back board.
- Have your secondary lifeguard dunk one rescue tube beneath the water and slide it underneath the head of the board by where you are standing.
- Have them then do the same thing, but place the tube under the foot of the board.

Part 3: Securing The Victim to The Board
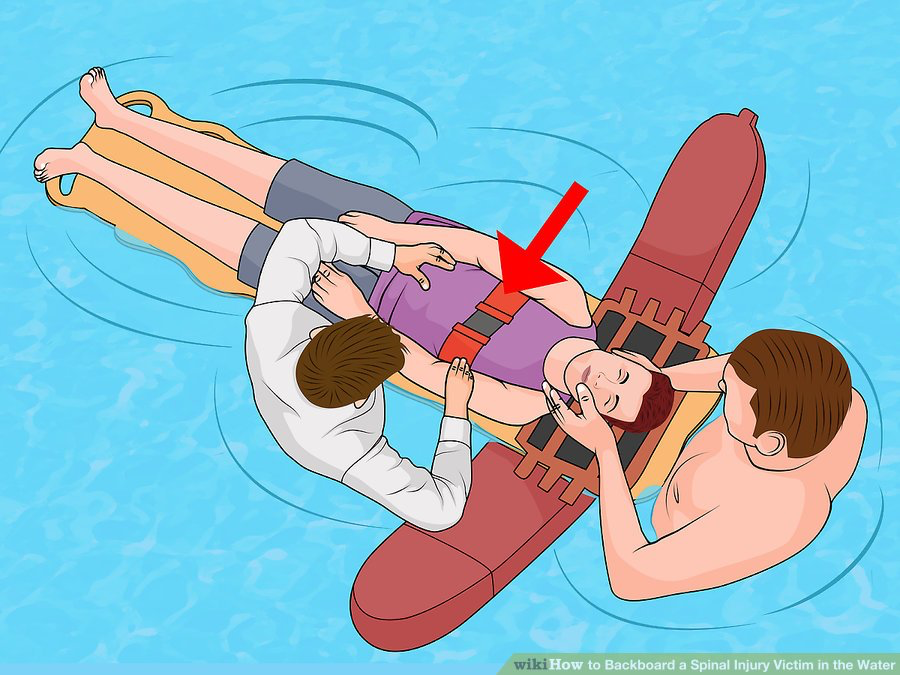
1. Place the straps of the backboard over the victim
To ensure the victim's safety when being removed from the pool and also for added immobilization, he/she must be secured with the straps attached to the backboard. Your secondary guard will preform this task while you maintain control of the victim's head and neck.
- Starting at the top of one side of the board, place the first strap under the victim's arm, but over his/her chest. Placing this first strap underneath the victim's arm before it goes over his/her chest secures the victim so they will not slip down and off the board when it is removed from the water. It holds them in place.
- Place the next strap over both the arm and chest. Since the first strap secures the victim from slipping down, the remaining straps can just go over everything.
- Continue down that side of the backboard until all of the strap on that side have been placed.

2. Finish securing victim with the straps
Repeat the previous process on the opposite side of the board. Do not reach over the board to do this as that may further harm the victim. Make sure, once again, that the first strap goes under the arm and over the chest, while the remaining straps go over everything. Once you have positioned each strap correctly, connect it to the coordinating strap by whatever means provided (Velcro, buckle, etc.).

3. Secure the head restraints
Once the victim's body is strapped into the backboard, his/her head must also be restrained using the head restraints provided with the board.
- Have your secondary lifeguard approach one side of the victim's head
- Instruct them to line the head restraint up with your hand and the victim's head
- On your count, have them slowly slide the restraint down along the side of the victim's head as you slowly pull your hand away
- Once the restraint it in place, replace your hand on the restraint as if you were still holding the victim's head.
- Repeat this procedure on the other side of the victim's head.

4. Finish securing the head restraints
Once both of the restraints are in place, use the head restraint strap attached to the head restraint portion of the board to completely immobilize the victim's head.
- Place the strap so that it lies across the victim's forehead.
- Secure the strap on the opposite side of the board.

Part 4: Removing The Victim From The Water
1. Position the backboard so it is ready for removal from the water
After finishing securing the victim to the board, grab one side of the board as you move from behind the head of the board to standing next to it. With the help of your secondary guard, place the top edge of the board on the gutter of the pool.

2. Position yourself so that you can remove the backboard and victim
After placing part of the backboard on to the gutter of the pool, hold the board as your secondary guard climbs out of the pool. Once out, instruct your secondary guard grab the top of the board as you move to the foot of the board.

3. Remove the backboard and the victim from the water
Once in place, instruct your secondary guard to pull the backboard towards them and away from the water as you push. Make sure your secondary guard keeps the board low to the ground to prevent dropping it and causing further harm to the victim.

Part 5: Comforting and Caring For Victim Until EMS Arrives
1. Treat any additional injuries
If the victim has any other injuries such as a cut or bump, treat accordingly. This might include applying a Band-Aid, icepack, or gauze patch.

2. Make sure victim is comfortable
While waiting for EMS to arrive, make sure victim is comfortable. For example, if they are cold, cover them with a towel/ emergency blanket.

_______________________________________________________________________________________________________________________
Are you a healthcare practitioner who enjoys patient education, interaction and communication?
If so, we invite you to criticise, contribute to or help improve our content. We find that many practicing doctors who regularly communicate with patients develop novel and often highly effective ways to convey complex medical information in a simplified, accurate and compassionate manner.
MedSquirrel is a shared knowledge, collective intelligence digital platform developed to share medical expertise between doctors and patients. We support collaboration, as opposed to competition, between all members of the healthcare profession and are striving towards the provision of peer reviewed, accurate and simplified medical information to patients. Please share your unique communication style, experience and insights with a wider audience of patients, as well as your colleagues, by contributing to our digital platform.
Your contribution will be credited to you and your name, practice and field of interest will be made visible to the world. (Contact us via the orange feed-back button on the right).